Pizza is a beloved dish worldwide, and its unique flavor often hinges on the quality and type of cheese used. While store-bought cheeses offer convenience, making your own cheese at home can elevate your pizza to a new level of flavor and authenticity. Whether you’re a seasoned home cook or a curious beginner, crafting your own cheese allows you to customize textures, flavors, and melting properties to suit your taste. This comprehensive guide explores the art and science of making homemade cheese specifically tailored for pizza, providing expert tips, recipes, and essential techniques to achieve perfect results every time.
- Understanding the Basics of Cheese Making for Pizza
- What Makes Cheese Suitable for Pizza?
- Essential Ingredients and Equipment
- Primary Ingredients
- Necessary Equipment
- Step-by-Step Guide to Making Homemade Pizza Cheese
- 1. Prepare the Milk
- 2. Add Starter Culture and Rennet
- 3. Curd Formation
- 4. Cutting and Heating Curds
- 5. Draining the Whey and Stretching
- 6. Seasoning and Shaping
- Tips for Perfect Homemade Pizza Cheese
- 1. Use the Right Milk
- 2. Temperature Control Is Crucial
- 3. Experiment with Milk Types and Additives
- 4. Use Quality Rennet and Cultures
- 5. Adjust Salt for Flavor and Preservation
- 6. Practice Stretching Technique
- 7. Store Properly for Best Melting
- Popular Variations of Homemade Cheese for Pizza
- 1. Classic Mozzarella
- 2. Fresh Buffalo Mozzarella
- 3. Smoked Cheese
- 4. Vegan and Dairy-Free Alternatives
- Measuring and Calculating Cheese Yield
- Cheese Yield Formula
- Common Troubleshooting Tips
- Safety and Storage Tips
Understanding the Basics of Cheese Making for Pizza
What Makes Cheese Suitable for Pizza?
The ideal cheese for pizza should melt smoothly, stretch without breaking, and add a rich, savory flavor profile. Different types of cheese offer distinct qualities:
- Mozzarella: Classic, mild, melts and stretches beautifully.
- Provolone: Slightly sharper flavor, good melting qualities.
- Cheddar: Sharpness and color, but less stretch.
- Fontina: Creamy texture with excellent meltability.
- Ricotta: Soft, used as an additive or topping for richness.
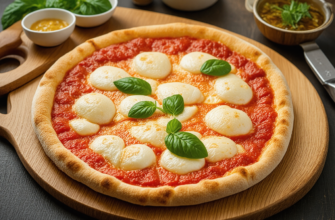
For homemade cheeses, focusing on mozzarella-style cheese is often the best choice for pizza, as it provides the perfect melt and stretch with mild flavor. However, customizing blends can help achieve unique flavor profiles and textures.
Essential Ingredients and Equipment
Primary Ingredients
| Ingredient | Purpose |
|---|---|
| Milk | The base for cheese; preferably whole milk for creaminess. Use fresh, unpasteurized if possible, or high-quality pasteurized milk. |
| Rennet | Enzyme that curdles the milk, forming curds and whey. |
| Starter Culture (Lactic acid bacteria) | Acidifies the milk, aiding curd formation and flavor development. |
| Salt | Preserves the cheese, enhances flavor, and improves texture. |
| Optional Additives | Herbs, spices, or milk treatments for flavor customization. |
Necessary Equipment
- Large heavy-bottomed pot
- Thermometer (preferably digital or milk themometer)
- Slotted spoon
- Cheesecloth or fine mesh strainer
- Milk vat or bowl for curd handling
- Mixer or whisk
- Plastic or wooden mold (for shaping)
- Aging containers (if aging)
Step-by-Step Guide to Making Homemade Pizza Cheese
1. Prepare the Milk
Start with fresh, high-quality milk. For best results, use whole milk from a trusted source. Pour the milk into a large heavy-bottomed pot and slowly heat it to the optimal temperature, typically around 32°C to 36°C (90°F to 96.8°F) for mozzarella. Stir gently to distribute heat evenly.
2. Add Starter Culture and Rennet
Once the milk reaches the desired temperature, add your starter culture. Stir gently and allow the milk to ferment for 30-45 minutes until it acidifies and begins to develop a soft curd. Then, add rennet diluted in a small amount of cool, non-chlorinated water, stirring gently for about 30 seconds.
3. Curd Formation
Let the milk sit undisturbed for 30-45 minutes to allow curd formation. The curd should be firm and a clean break when cut with a knife. Accurate control of time and temperature ensures proper texture for melting.
4. Cutting and Heating Curds
Cut the curd into small cubes (~1 cm pieces). Slowly heat the curds over gentle heat, stirring gently to prevent matting. Gradually increase the temperature to about 40°C–50°C (104°F–122°F) over 30 minutes, allowing whey to release and curds to firm up.
5. Draining the Whey and Stretching
Once the curds have expelled sufficient whey, transfer them into a cheesecloth-lined colander. Press gently to remove excess whey. To achieve that perfect meltability, the cheese must be kneaded and stretched at the right temperature, typically around 65°C–80°C (149°F–176°F). This process helps develop the cheese’s elasticity for pizza.
6. Seasoning and Shaping
Add salt during or after the stretching process for flavor and preservation. Shape the cheese into balls or blocks and allow it to cool at room temperature. At this stage, you can incorporate herbs or spices if desired.
Tips for Perfect Homemade Pizza Cheese
1. Use the Right Milk
Fresh, high-quality milk yields the best flavor and texture. Avoid ultra-pasteurized milk, as it can interfere with coagulation and melting qualities. Organic or farm-fresh milk often produces superior results.
2. Temperature Control Is Crucial
Maintaining precise temperatures during heating, curdling, and stretching phases is essential for optimal meltability and consistency.
3. Experiment with Milk Types and Additives
Different milks (cow, buffalo, goat) and additives (powdered milk, cream) can alter the flavor and texture. Experiment to find your preferred combination.
4. Use Quality Rennet and Cultures
The type and potency of rennet, along with the starter culture strain, significantly influence the flavor and melting properties of the cheese. Opt for food-grade ingredients from reputable sources.
5. Adjust Salt for Flavor and Preservation
Salt not only enhances flavor but also helps in moisture control. Use it judiciously—about 2-3% of the cheese weight—for flavor and preservation.
6. Practice Stretching Technique
Proper stretching at high temperature develops the cheese’s fiber structure. Use gloves or tools to handle hot cheese safely and stretch repeatedly until smooth and elastically consistent.
7. Store Properly for Best Melting
Wrap the finished cheese tightly in plastic wrap or vacuum-sealed bags. Store in the refrigerator for up to two weeks or age further for flavor development. For maximum meltability, reheat gently before adding to pizza.
Popular Variations of Homemade Cheese for Pizza
1. Classic Mozzarella
The most popular choice, known for its stretch and mild flavor. Ideal for traditional pizza styles.
2. Fresh Buffalo Mozzarella
Higher fat content and softer texture, with a more pronounced flavor. Needs careful handling but offers a gourmet touch.
3. Smoked Cheese
Adding smoked flavor during the curd process introduces depth and aroma, perfect for specialty pizzas.
4. Vegan and Dairy-Free Alternatives
For those with dietary restrictions, plant-based cheese substitutes can be homemade using nuts, soy, or root vegetables. These require specialized techniques but can be crafted to mimic meltability.
Measuring and Calculating Cheese Yield
Cheese Yield Formula
Understanding yield helps in planning quantities. The general formula:
Cheese Yield (%) = (Weight of Cheese / Weight of Milk) × 100
Standard mozzarella cheese yields approximately 10-15% of the milk’s weight, depending on the process and milk quality.
Common Troubleshooting Tips
- Curd too soft: Not enough acidification or insufficient heating.
- Cheese doesn’t melt well: Using low-quality or ultra-pasteurized milk or overcooking during stretching.
- Cheese is too salty: Excessive salt addition during shaping.
- Cheese is crumbly: Overheating or improperly handling curds.
Safety and Storage Tips
Always sanitize utensils and work surfaces to prevent contamination. Store homemade cheese in airtight containers in the refrigerator, and consume within 1–2 weeks for best flavor and safety. For longer storage, consider freezing portions, although this may affect texture.
Making your own cheese for pizza is both an art and a science, requiring attention to detail, patience, and a bit of experimentation. By understanding the fundamental principles—such as selecting quality ingredients, controlling temperature, and mastering the stretching technique—you can craft cheese that elevates your homemade pizza. Whether you prefer the classic melt of mozzarella, the richness of provolone, or your own customized blend, homemade cheese offers unmatched freshness and flavor, transforming an ordinary dish into a culinary masterpiece. Embrace the process, refine your techniques, and enjoy the satisfaction of creating perfect cheese tailored for your pizza cravings.
With practice, creativity, and attention to detail, making pizza cheese at home becomes an enjoyable and rewarding endeavor, allowing every pizza to be a unique expression of taste and craftsmanship.
Похожие записи:
 Choosing the Right Cheese Blends for Melting Excellence: The Ultimate Guide
  Ultimate Guide to Troubleshooting Common Pizza Baking Problems: Tips & Solutions
  Ultimate Guide: Tips for Cooking Different Styles of Pizza at Home
  Ultimate Guide: Tips for Storing Leftover Pizza Without Losing Quality
  Mastering Restaurant-Quality Pizzas at Home: The Ultimate Guide to Using a Pizza Stone
  Mastering the Art of Stretching Pizza Dough Without Tearing: Techniques, Tips, and Secrets
  Using a Grill to Achieve Smoky-Flavored Pizzas: The Ultimate Guide for Pizza Enthusiasts Roasted Garlic, Artichoke Hearts, and Parmesan Cheese for a Savory Experience: A Gourmet Twist in Pizza Making
  Vegan Cheese Options and Their Nutritional Advantages on Pizza: A Comprehensive Guide
  Mastering Homemade Pizza Dough: Expert Tips for Perfect Results
  Mastering the Art of Stuffed Crusts: Techniques for Making Delicious Pizzas at Home
  Mastering the Art of Pizza Parties: How to Host an Unforgettable Pizza-Making Gathering at Home
  Choosing the Perfect Flour for Flawless Pizza Dough: A Complete Guide Mastering the Art of Stuffed and Deep-Dish Pizzas: Techniques, Tips, and Recipes
  The Journey of Creating Vegan Cheese for Pizza: From Concept to Slice
  Creating Flavorful and Colorful Veggie-Based Pizzas: A Guide to Delicious, Healthy, and Vibrant Pies