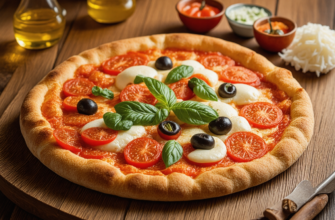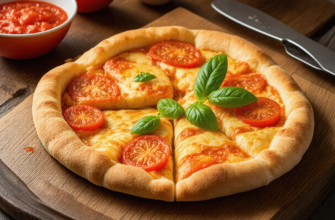
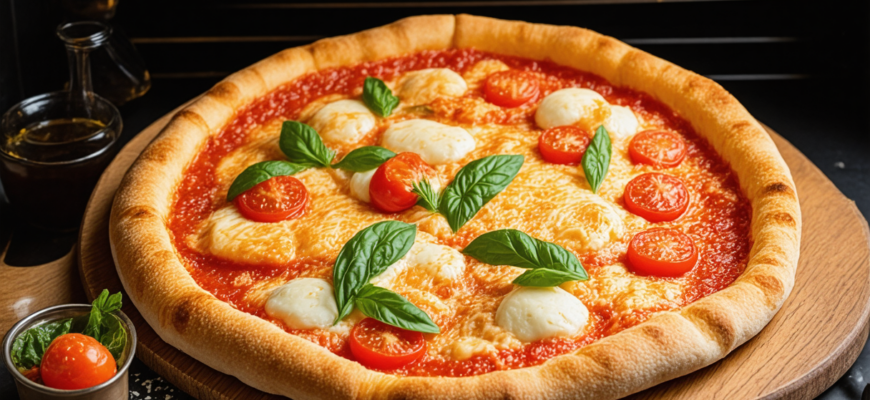
In the world of culinary art, few dishes evoke the same level of passion and delight as a perfectly crafted pizza. Whether you’re a home cook eager to elevate your pizza-making skills or a professional restaurateur aiming to deliver authentic flavors, the key to achieving that crispy crust and perfectly cooked toppings often lies in the tools you use—particularly, the humble pizza stone. This comprehensive guide will explore the history, benefits, best practices, and expert tips for using a pizza stone to produce restaurant-quality pizzas right in your own kitchen.
- Introduction to Pizza Stones
- What Is a Pizza Stone?
- The Historical Roots of Pizza Stones
- Why Use a Pizza Stone?
- Benefits of Using a Pizza Stone
- Common Materials and Types
- Preparing and Using Your Pizza Stone
- Choosing the Perfect Pizza Stone
- Proper Installation and Initial Use
- Preparing the Pizza
- Transferring the Pizza
- Step-by-Step Baking Guide
- 1. Preheat the Oven
- 2. Prepare Your Pizza
- 3. Transfer the Pizza
- 4. Baking Time
- 5. Removal and Cooling
- Expert Tips for Perfect Pizza with a Pizza Stone
- 1. Use the Right Flour
- 2. Optimize Topping Preparation
- 3. Experiment with Temperatures and Timing
- 4. Use Cornmeal or Semolina for Easier Transfer
- 5. Maintain Your Pizza Stone
- Common Mistakes and How to Avoid Them
- Overloading with Toppings
- Not Preheating the Stone Long Enough
- Using Cold Dough
- Temperature Fluctuations
- Alternative Uses for a Pizza Stone
- Comparing Pizza Stones and Other Baking Surfaces
- Pizza Stone vs. Baking Steel
- Achieving Restaurant-Quality Results: Key Takeaways
Introduction to Pizza Stones
What Is a Pizza Stone?
A pizza stone is a flat, heat-retentive surface — typically made from ceramic, cordierite, or sometimes soapstone — designed to simulate the conditions of a traditional brick oven. By absorbing and evenly distributing heat, a pizza stone creates a high-temperature environment that promotes a crisp crust, authentic browning, and even cooking of toppings.
The Historical Roots of Pizza Stones
Historically, artisan bakers and pizza makers relied on stone surfaces like clay or natural stone ovens to achieve ideal baking conditions. Modern pizza stones are sophisticated reinventions of centuries-old techniques, bringing the essence of traditional baking into the homes and restaurants of today. Their development was a response to the growing demand for authentic, wood-fired-style pizza outside of specialized ovens.
Why Use a Pizza Stone?
Benefits of Using a Pizza Stone
- Crispy Crust: The high heat transfer ensures a crispy base similar to that produced in professional pizza ovens.
- Even Cooking: Distributes heat uniformly, minimizing hot spots and ensuring consistent results.
- Enhanced Flavor: The stone’s ability to absorb moisture helps develop a richer, more complex crust.
- Versatility: Can be used for baking bread, calzones, and even roasting vegetables.
- Ease of Use: Once heated, simplifies the cooking process, allowing even novice cooks to achieve professional results.
Common Materials and Types
Choosing the right pizza stone depends on factors like material, size, and heat retention properties. The main types include:
| Material | Advantages | Disadvantages |
|---|---|---|
| Ceramic | Cost-effective, good heat retention | Can crack under thermal shock |
| Cordierite | Highly durable, withstands thermal shock better | Heavier and more expensive |
| Soapstone | Excellent heat retention, natural feel | Heavy, costly, and may require special handling |
Preparing and Using Your Pizza Stone
Choosing the Perfect Pizza Stone
Before use, consider the size of your oven and the space available. The stone should fit comfortably without obstructing airflow or oven heating elements. Additionally, opt for a material that suits your baking style and budget.
Proper Installation and Initial Use
- Place the pizza stone on a middle or lower rack in the oven before preheating. This prevents thermal shock caused by sudden temperature changes.
- Preheat the oven with the stone inside at the maximum temperature (usually 250°C or higher) for at least 45 minutes to 1 hour. This ensures the stone reaches optimal temperature.
- Use a thermometer to verify that the stone is evenly heated.
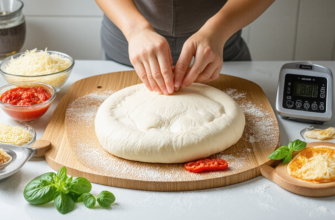
Preparing the Pizza
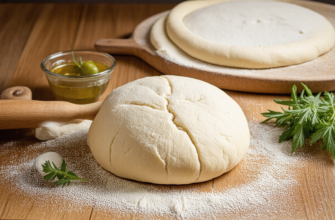
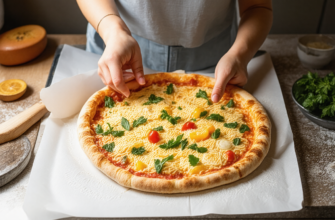
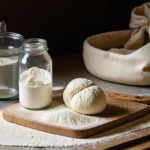
For best results, handle the dough carefully and avoid excessive flour or toppings that can cause sogginess. Keeping toppings light and using proper techniques like stretching or rolling dough evenly helps achieve uniform cooking.
Transferring the Pizza
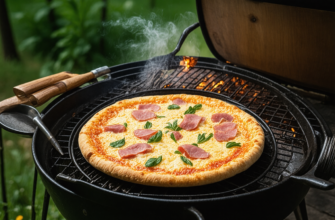
Place your prepared pizza onto a pizza peel or an inverted baking sheet sprinkled with flour or cornmeal for easier transfer. Gently slide the pizza onto the preheated stone for optimal results.
Step-by-Step Baking Guide
1. Preheat the Oven
Set your oven to the highest temperature possible—often between 250°C and 300°C (480°F – 572°F)—and preheat the pizza stone for a minimum of 45 minutes to ensure it’s thoroughly hot.
2. Prepare Your Pizza
While the oven is heating, assemble your pizza with the desired sauce, cheese, and toppings. Less is more; overly loaded pizzas can hinder proper cooking and result in sogginess.
3. Transfer the Pizza
Slide the prepared pizza onto the hot stone carefully, ensuring it slides smoothly without sticking.
4. Baking Time
- Typically, pizza spends between 7 to 12 minutes on the stone, depending on thickness and toppings.
- Check periodically to prevent overbaking or burning, especially in very hot ovens.
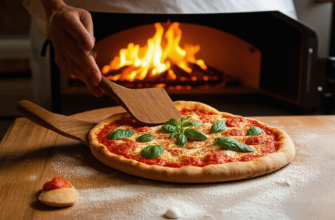
5. Removal and Cooling
Use a pizza peel or tongs to remove the pizza carefully. Let it cool for a couple of minutes before slicing to allow toppings to set and to prevent burns.
Expert Tips for Perfect Pizza with a Pizza Stone
1. Use the Right Flour
High-protein bread flour or Italian tipo ’00’ flour provides better gluten development, resulting in a more elastic dough that stretches well and yields a crispy crust.
2. Optimize Topping Preparation
- Pre-cook toppings like sausage or vegetables to reduce moisture and cooking time.
- Keep toppings light to avoid sogginess and ensure even baking.
3. Experiment with Temperatures and Timing
Every oven and pizza stone combination is unique. Record your settings and adjust baking time and temperature to find the perfect balance for your equipment.
4. Use Cornmeal or Semolina for Easier Transfer
Sprinkle flour, cornmeal, or semolina on your peel or baking sheet to prevent sticking and facilitate smooth transfer onto the stone.
5. Maintain Your Pizza Stone
- Do not soap wash the stone; instead, brush off food debris and wipe with a damp cloth if necessary.
- Allow the stone to cool naturally before cleaning to avoid cracking.
- Occasionally, bake plain bread or pizza to burn off residual odors or build seasoning.
Common Mistakes and How to Avoid Them
Overloading with Toppings
Too many toppings, especially with high moisture content, can make the crust soggy. Keep toppings light and pre-cooked when appropriate.
Not Preheating the Stone Long Enough
Insufficient preheating results in a less crispy crust. Always allow the stone to heat for at least 45 minutes to an hour.
Using Cold Dough
Cold or partially thawed dough can cause uneven baking. Use room temperature dough and consider cold fermentation for flavor development.
Temperature Fluctuations
Rapid temperature changes can crack the stone. Avoid removing the stone from the oven prematurely or exposing it to cold water.
Alternative Uses for a Pizza Stone
- Baking artisan bread and baguettes for professional-quality crusts
- Roasting vegetables and meats for enhanced flavor and texture
- Cooking calzones, stromboli, and other stuffed dishes
Comparing Pizza Stones and Other Baking Surfaces
Pizza Stone vs. Baking Steel
| Feature | Pizza Stone | Baking Steel |
|---|---|---|
| Heat Conductivity | Good, but less than steel | Excellent, provides faster heat transfer |
| Durability | Less durable; can crack over time | Highly durable, virtually unbreakable |
| Weight | Light to medium | Heavier |
| Ease of Cleaning | Requires gentle cleaning; avoid soap | Simple wipe with a damp cloth |
Achieving Restaurant-Quality Results: Key Takeaways
- Preheat the pizza stone thoroughly for at least 45 minutes.
- Use high-quality dough and minimal toppings for optimal crispness.
- Maintain consistent oven temperatures and baking times based on experimentation.
- Handle the pizza carefully during transfer to avoid losing toppings or damaging the crust.
- Regularly clean and care for your pizza stone to extend its lifespan.
Using a pizza stone is a proven method to bridge the gap between home cooking and professional pizzeria results. The combination of high heat, moisture absorption, and even heat distribution produces a crust and overall pizza quality that significantly elevates homemade pies. With proper selection, preparation, and technique, any home cook or restaurateur can master the art of pizza baking and consistently serve delicious, restaurant-quality pizzas that impress every time.
Whether you focus on traditional Neapolitan styles or creative topping combinations, mastering the use of a pizza stone will unlock new culinary possibilities and bring authentic flavors directly to your table.
Похожие записи:
 Choosing the Perfect Flour for Flawless Pizza Dough: A Complete Guide
 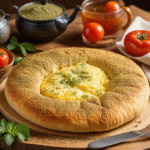 Lebanese Manakish with Za’atar and Cheese: A Delicious Twist on Traditional Pizzas
  Scandinavian Rye-Based Flatbread Pizzas: A Delicious Twist on Traditional Pizza
  Belgian Tarte Flambée: The Crisp and Delicious Classic
  Neapolitan Pizza: The Art of Authentic Preparation
  Albanian Flia with Layered Fillings: A Delicious Twist on Traditional Pizzas
  The Technological Innovations in Pizza Baking Techniques: Transforming Tradition into Modern Masterpieces
  Swedish Spritz with Its Thin Crust and Savory Toppings: A Delicious Twist in Pizza Styles
  French Pissaladière with Caramelized Onions and Anchovies: A Classic Cuisine Delight
  Sicilian Pizza: A Delicious Dive into Thick, Square Slices and Its Rich History
  Discover the Bold Flavors of Serbian Pizza with Spicy Sausage and Peppers Armenian Lahmajoon with Spicy Meat Topping: A Delicious Taste of Tradition Calzone: The Folded Pizza from Italy – A Delicious Journey into Italian Cuisine
  Margarita Pizza: Italy’s Timeless Classic
  Roman Pizza al Taglio and Its Rectangular Slices: A Deep Dive into Tradition, Technique, and Tastes
  Ukrainian Pyrizhky with Savory Fillings: A Delicious Tradition