Pizza is a beloved culinary creation enjoyed worldwide, with countless variations suited to every taste. Among its many styles, thin-crust pizza stands out for its lightness, crunchiness, and perfectly balanced texture. Achieving that ideal thin crust—crispy yet tender—requires understanding key principles of dough preparation, baking techniques, and ingredient selection. This comprehensive guide explores proven tips and expert advice on how to craft thin-crust pizza that is both delightfully crispy on the outside and tender on the inside. Whether you’re a home cook or an aspiring pizzaiolo, these insights will help elevate your pizza-making skills to new heights.
- Understanding the Components of a Perfect Thin-Crust Pizza
- The Role of Dough in Thin-Crust Pizza
- Key Ingredients for Thin-Crust Dough
- Techniques for Achieving a Crispy and Tender Thin Crust
- 1. Selecting the Right Flour
- 2. Balancing Hydration Levels
- 3. Proper Kneading and Gluten Development
- 4. Controlled Fermentation
- 5. Precise Shaping and Rolling Technique
- 6. Pre-baking and Using a Pizza Stone or Steel
- Step-by-Step Guide to Making Thin-Crust Pizza
- Ingredients Overview
- Procedure
- Common Troubleshooting Tips
- Soggy Crust
- Too Hard or Tough Crust
- Uneven Baking
- Additional Tips to Enhance Crust Quality
- 1. Use the Right Oven Temperature
- 2. Incorporate Cornmeal or Semolina
- 3. Brush the Edges with Olive Oil
- 4. Experiment with Different Toppings
- Science Behind Thin-Crust Pizza Perfection
- The Maillard Reaction
- Gluten Development and Dough Elasticity
- Hydration and Crust Texture
- Sample Recipe for the Perfect Thin-Crust Pizza
- Ingredients:
- Instructions:
Understanding the Components of a Perfect Thin-Crust Pizza
The Role of Dough in Thin-Crust Pizza
The foundation of any great pizza is its dough. For thin-crust varieties, the dough must strike a delicate balance—it needs to be sturdy enough to hold toppings without becoming soggy, yet light and tender enough to deliver a satisfying bite. The key factors that influence dough behavior include the flour type, hydration level, kneading process, and fermentation time.
Key Ingredients for Thin-Crust Dough
| Ingredient | Purpose |
|---|---|
| High-Protein Flour (e.g., Bread Flour, Tipo 00) | Provides strength, elasticity, and a chewy texture |
| Water | Hydrates the flour and activates gluten formation |
| Salt | Enhances flavor and helps regulate yeast activity |
| Yeast | Leavens the dough, creating air pockets and tenderness |
| Olive Oil | Adds flavor, increases dough pliability, and promotes crispy crust |
| Sugar (Optional) | Feeds yeast, promotes browning |
Techniques for Achieving a Crispy and Tender Thin Crust
1. Selecting the Right Flour
The choice of flour significantly influences the texture of the crust. Italian Tipo 00 flour is highly regarded for its finely milled consistency and high protein content, which yields a dough that is both strong and stretchy. Bread flour with high protein levels can also be used, but Tipo 00 offers superior results for that authentic thin and crispy texture.
Pro tip: Avoid using all-purpose flour exclusively, as it may not develop enough gluten for optimal stretchability and crispness.
2. Balancing Hydration Levels
Hydration—the ratio of water to flour—affects dough elasticity and final texture. For thin-crust pizza, a hydration level of 55-65% is optimal. Higher hydration yields a softer, more tender crust; lower hydration produces a denser, crunchier result.
Formulation example:
- Flour: 500g
- Water: 275-325g (55-65%)
- Salt: 10g
- Yeast: 2-5g
- Olive oil: 10-15g
3. Proper Kneading and Gluten Development
Intensive kneading activates gluten, giving the dough extensibility and strength. For a thin crust, knead until the dough is smooth and elastic, about 8-10 minutes by hand or 5 minutes with a stand mixer. Avoid over-kneading, which can make the crust tough.
Tip: Use the windowpane test—stretch a small piece of dough into a thin, translucent membrane without tearing—to check gluten development.
4. Controlled Fermentation
Fermentation time greatly affects crust flavor and texture. A slow, cold fermentation (refrigeration for 12-72 hours) enhances flavor and gluten structure, resulting in a more tender yet crispy crust. For faster preparation, a room temperature fermentation of 1-2 hours is acceptable, but the flavor may be less complex.
Summary of fermentation options:
- Quick Ferm: 1-2 hours at room temperature
- Cold Fermentation: 12-72 hours refrigerated, then brought to room temperature before baking
5. Precise Shaping and Rolling Technique
Shape the dough into a thin disk, avoiding excessive stretching that can cause holes. For uniform thickness, use a rolling pin or your hands to gently coax the dough outward. Keep the edges slightly thicker for a rim, but ensure the main surface remains thin.
6. Pre-baking and Using a Pizza Stone or Steel
Preheating your oven with a pizza stone or steel to at least 250°C (482°F) ensures direct heat transfer, critical for crispy crusts. Pre-bake the dough for 3-5 minutes before adding toppings to prevent sogginess.
Tips for best results:
- Use a pizza peel for easy transfer
- Allow the stone or steel to preheat thoroughly for even cooking
- Avoid overcrowding the oven; bake pizzas individually if necessary
Step-by-Step Guide to Making Thin-Crust Pizza
Ingredients Overview
- High-quality pizza flour (Tipo 00 or bread flour)
- Fresh yeast or active dry yeast
- Warm water
- Sea salt
- Extra virgin olive oil
- Toppings of choice (e.g., tomato sauce, mozzarella, herbs, vegetables, meats)
Procedure
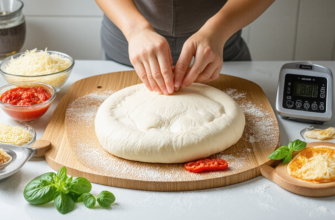
- Prepare the Dough: In a mixing bowl, combine warm water and yeast; let sit until foamy, about 5-10 minutes. Add flour, salt, olive oil, and mix until a shaggy dough forms. Knead until smooth and elastic.
- Fermentation: Cover the dough with plastic wrap or a damp cloth. Allow to ferment for at least 1 hour at room temperature or longer in the refrigerator.
- Shape the Dough: Punch down the dough and divide into portions if making multiple pizzas. Roll or stretch into a thin circle.
- Pre-bake: Transfer to a preheated pizza stone or baking sheet, bake for 3-5 minutes.
- Add Toppings and Bake: Remove from oven, add toppings, then return to oven and bake until cheese melts and crust turns golden and crisp, about 7-10 minutes. Use a pizza peel to transfer for best results.
Common Troubleshooting Tips
Soggy Crust
- Use a hot pizza stone or steel for direct heat transfer.
- Pre-bake the crust before adding toppings.
- Avoid excessive moisture in toppings—dry vegetables or use drained tomato sauce.
Too Hard or Tough Crust
- Use proper hydration levels as noted.
- Avoid over-kneading the dough.
- Ferment longer at cooler temperatures to develop flavor and tenderness.
Uneven Baking
- Ensure oven is preheated thoroughly.
- Use a pizza stone or steel for consistent heat.
- Rotate the pizza midway during baking if necessary.
Additional Tips to Enhance Crust Quality
1. Use the Right Oven Temperature
Achieving maximum crispiness requires high baking temperatures—250°C (482°F) or more. Many home ovens can reach this with proper preheating; professional pizza ovens often operate between 430-500°C (800-930°F).
2. Incorporate Cornmeal or Semolina
Sprinkling cornmeal or semolina on the peel or baking surface prevents sticking and adds a subtle crunch to the crust.
3. Brush the Edges with Olive Oil
Applying a light brush of olive oil to the crust edges before baking enhances browning and crispness.
4. Experiment with Different Toppings
The moisture content of toppings influences crust texture. Thinner slices of vegetables, pre-cooked meats, and draining excess moisture reduce sogginess.
Science Behind Thin-Crust Pizza Perfection
The Maillard Reaction
This chemical process occurs when amino acids and sugars react at high temperatures, resulting in the desirable browning and complex flavors of the crust. Ensuring a hot oven facilitates this reaction, giving the crust its characteristic color and aroma.
Gluten Development and Dough Elasticity
Proper kneading and fermentation allow gluten networks to form, providing strength and extensibility. This structure is essential for stretching the dough thin without tearing and achieving a crispy yet tender crust.
Hydration and Crust Texture
Higher hydration levels tend to produce a more tender and airy crust with some chew, while lower hydration results in a crisper, denser crust. Optimizing hydration is crucial for balancing crispness and tenderness.
Sample Recipe for the Perfect Thin-Crust Pizza
Ingredients:
- Tipo 00 flour – 500g
- Warm water – 300g (60%)
- Fresh yeast – 10g
- Sea salt – 10g
- Olive oil – 15g
Instructions:
- Mix yeast with warm water; let activate for 5-10 minutes.
- Add flour, salt, and olive oil to the yeast mixture. Mix until a shaggy dough forms.
- Knead for 8-10 minutes until smooth and elastic.
- Cover and ferment for 24 hours in the refrigerator, or 1-2 hours at room temperature.
- Preheat oven with pizza stone to 250°C (482°F).
- Shape the dough into a thin circle, pre-bake for 4 minutes.
- Add toppings, then bake for an additional 7-10 minutes until golden and crispy.
Mastering the art of making thin-crust pizza that strikes the perfect balance between crispiness and tenderness involves understanding the science behind dough and baking techniques. From selecting the right flour and controlling hydration to precise kneading, fermentation, and baking methods, each step plays a critical role in achieving superior results. Experimentation with temperatures, ingredients, and shaping techniques allows bakers—both novices and experts—to refine their skills continually. Ultimately, a crispy yet tender thin crust enhances the overall pizza experience, creating a delightful harmony of textures that excites the palate and elevates homemade pizza to restaurant-quality standards.
Enjoy exploring different recipes and techniques, and remember that the perfect crust is a personal journey rooted in understanding ingredients, science, and tradition. Happy baking!
Похожие записи:
 Mastering Oven Temperatures: The Key to Perfect Baking Every Time
  New York-Style Thin Crust Pizza: The Iconic Street Food of the Big Apple
  Swedish Spritz with Its Thin Crust and Savory Toppings: A Delicious Twist in Pizza Styles
 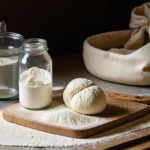 Choosing the Perfect Flour for Flawless Pizza Dough: A Complete Guide
  The Evolution of New York Thin-Crust Pizza: A Culinary Heritage of Flavor and Tradition
  Mastering the Art of Evenly Cooked Pizza Toppings Without Burning the Crust
 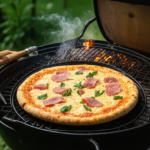 Using a Grill to Achieve Smoky-Flavored Pizzas: The Ultimate Guide for Pizza Enthusiasts
  Mastering Vegan and Vegetarian Pizza: Delicious Recipes and Culinary Inspiration
  Mastering the Art of Stuffed Crusts: Techniques for Making Delicious Pizzas at Home
  Mastering Restaurant-Quality Pizzas at Home: The Ultimate Guide to Using a Pizza Stone
  Mastering Pizza Transfers: How Parchment Paper Simplifies Your Cooking Process
  Discover the Perfect Georgian Mchadi with Toppings: A Delicious Traditional Bread to Complement Every Meal
  Ultimate Guide: Tips for Cooking Different Styles of Pizza at Home
  Creative Ways to Make Gluten-Free Pizza Crusts: Elevate Your Pizza Experience
  Neapolitan Pizza: The Art of Authentic Preparation
  Roman Pizza al Taglio and Its Rectangular Slices: A Deep Dive into Tradition, Technique, and Tastes