Pizza, one of the world’s most beloved dishes, captivates taste buds with its crispy crust, flavorful toppings, and delightful texture. At the heart of a truly exceptional pizza lies the dough — a simple yet crucial component that determines the final quality of the pie. While ingredients like flour and toppings often steal attention, mastering the fermentation of dough is an art that significantly influences the crust’s texture, flavor, and appearance. This comprehensive guide will explore the science behind dough fermentation, offer practical tips, and reveal proven techniques to help both home cooks and aspiring pizzaiolos craft bakery-quality crusts with unparalleled taste and consistency.
- Understanding Dough Fermentation: The Science Behind It
- What is Dough Fermentation?
- The Role of Yeast and Bacteria
- Fermentation Types
- The Impact of Proper Fermentation on Pizza Crust
- Flavor Development
- Texture and Structure
- Digestibility
- Techniques for Optimal Dough Fermentation
- Control Temperature
- Fermentation Time and Scheduling
- Hydration Level
- Type of Flour
- Practical Steps to Ferment Dough Properly
- Step 1: Mixing Ingredients and Autolyse
- Step 2: Adding Salt and Yeast
- Step 3: Bulk Fermentation
- Step 4: Cold Fermentation (Optional)
- Step 5: Shaping and Final Proof
- Tips and Tricks for Perfect Fermentation
- Use a Thermometer and Humidity Control
- Monitor Dough for Signs of Readiness
- Experiment with Fermentation Times
- Incorporate Sourdough Starters
- Sample Fermentation Schedule for a Perfect Crust
- Common Mistakes to Avoid in Dough Fermentation
- Overfermentation
- Undfermentation
- Incorrect Temperature
- Inconsistent Hydration
- Unlocking the Full Potential of Your Pizza Dough
- Additional Resources
- References
Understanding Dough Fermentation: The Science Behind It
What is Dough Fermentation?
Dough fermentation is the biological process where yeast and bacteria convert sugars in the dough into alcohol, carbon dioxide, and organic acids. This process causes the dough to rise, develop flavor, and create the elastic, chewy texture characteristic of good pizza crust. Proper fermentation allows gluten networks to develop fully, resulting in a light and airy interior coupled with a crispy exterior.
The Role of Yeast and Bacteria
- Yeast: Saccharomyces cerevisiae is the most common yeast used in pizza dough. It ferments sugars, producing carbon dioxide (which leavens the dough) and alcohol (contributing to flavor).
- Bacteria: Lactic acid bacteria, naturally present or added via sourdough starters, produce organic acids that enhance flavor complexity and improve dough stability.
Fermentation Types
- Bulk fermentation (or primary fermentation): The initial period where the dough is allowed to rise after mixing.
- Proofing (or secondary fermentation): The final rise after shaping the dough before baking.
The Impact of Proper Fermentation on Pizza Crust
Flavor Development
Extended fermentation allows complex flavor compounds to develop. Short fermentations often result in a bland crust, while longer, slower fermentation produces a rich, slightly tangy flavor profile that complements toppings beautifully.
Texture and Structure
Well-fermented dough exhibits a desirable chewy yet tender crumb with a well-developed gluten network. The crust becomes crisp on the outside while maintaining softness inside.
Digestibility
Sourdough or longer fermentation processes partially break down gluten and starches, making the crust easier to digest and less heavy on the stomach.
Techniques for Optimal Dough Fermentation
Control Temperature
Temperature plays a vital role in fermentation efficiency. Typical optimal ranges include:
| Fermentation Type | Optimal Temperature | Expected Time Frame |
|---|---|---|
| Bulk fermentation | 20°C – 24°C (68°F – 75°F) | 1-2 hours (or longer for cold fermentation) |
| Cold fermentation | 4°C – 8°C (39°F – 46°F) | 12-72 hours |
| Proofing | 26°C – 28°C (78°F – 82°F) | 1-3 hours |
Fermentation Time and Scheduling
Adjusting fermentation times allows for flavor development and dough texture. Here are common approaches:
- Fast fermentation: 1-2 hours at room temperature
- Cold fermentation: 8-72 hours in refrigeration for more flavor and better structure
- Extended fermentation: Up to 5 days for maximum flavor complexity (used in artisan styles)
Hydration Level
The amount of water in the dough affects fermentation. Higher hydration (around 65-75%) promotes better fermentation, resulting in a more open crumb and crisp crust. Proper hydration supports yeast activity and gluten development.
Type of Flour
Strong bread flour with high gluten content (>12%) facilitates fermentation and provides elasticity. Incorporating whole wheat or specialty flours adds flavor but may require adjustments in hydration and fermentation time.
Practical Steps to Ferment Dough Properly
Step 1: Mixing Ingredients and Autolyse
Combine flour and water first, and let the mixture rest for 20-30 minutes. This process, called autolyse, hydrates gluten and starches, kick-starts fermentation, and improves extensibility.
Step 2: Adding Salt and Yeast
After autolyse, incorporate salt and yeast (or prefer sourdough starter) into the dough. Salt regulates fermentation and strengthens gluten, while yeast drives the fermenting process.
Step 3: Bulk Fermentation
Allow the dough to ferment in a container covered with a damp cloth or plastic wrap. Turn or stretch-and-fold the dough periodically (every 30 minutes during the first 1-2 hours) to develop strength and promote even fermentation.
Step 4: Cold Fermentation (Optional)
Place the dough in a sealed container in the refrigerator for extended fermentation. This slow process enhances flavor and improves crust texture. Remove the dough approximately 1 hour before baking to allow it to come to room temperature and finish its rise.
Step 5: Shaping and Final Proof
Shape the dough into desired forms and let proof at room temperature until it slightly puffs up—this is the final fermentation stage. Do not over-proof to prevent deflation.
Tips and Tricks for Perfect Fermentation
Use a Thermometer and Humidity Control
Maintaining consistent temperature and humidity levels ensures predictable fermentation. Use a temperature-controlled proof box or find a warm corner away from drafts. Cover dough properly to prevent drying out.
Monitor Dough for Signs of Readiness
- Dough has doubled in size during bulk fermentation
- Surface appears bubbly and airy
- Gently poke the dough; it should spring back slowly
Experiment with Fermentation Times
Adjust times based on flavor preference and ambient conditions. Longer fermentations yield complex, tangy crusts, while shorter ones produce milder flavors.
Incorporate Sourdough Starters
Using a natural sourdough starter introduces beneficial bacteria, enhances flavor, and improves crust quality. Sourdough ferments at a slower rate, requiring careful management of temperature and timing.
Sample Fermentation Schedule for a Perfect Crust
| Stage | Time Frame | Temperature | Description |
|---|---|---|---|
| Mixing and Autolyse | 20-30 minutes | – | Combine ingredients, hydrate flour, promote gluten formation |
| Bulk fermentation | 1-2 hours (or up to 24 hours in fridge) | 20°C – 24°C (or cooler for cold fermentation) | Yeast activity, flavor development, gluten strengthening |
| Proofing | 1-3 hours | 26°C – 28°C | Final rise before baking |
Common Mistakes to Avoid in Dough Fermentation
Overfermentation
Allowing dough to ferment beyond the optimal point leads to sour, tough, or collapsed crusts. Signs include a highly bubbly surface and a sour smell.
Undfermentation
Insufficient fermentation results in dense, doughy crusts with little flavor development. Dough may not stretch well and lacks openness.
Incorrect Temperature
Too hot speeds up fermentation excessively, causing overproofing. Too cold slows fermentation, leading to underdeveloped flavor and structure.
Inconsistent Hydration
Inadequate water content can lead to stiff dough that doesn’t ferment well, while overly hydrated dough can be sticky and difficult to handle.
Unlocking the Full Potential of Your Pizza Dough
Proper fermentation is the foundation of excellent pizza crusts. By understanding the science behind fermentation and carefully controlling factors like temperature, hydration, and timing, every pizza enthusiast can elevate their baking skills. Whether using a quick rise or indulging in a long, slow fermentation, these techniques transform simple ingredients into culinary masterpieces with fragrant, crispy, and airy crusts. Practice, patience, and precision are the keys to mastering dough fermentation — the secret weapon behind mouthwatering pizza that delights every taste.
Additional Resources
- Homemade Sourdough Starters: A Complete Guide
- How to Create a Fermentation-Friendly Kitchen Environment
- Top Tips for Achieving Restaurant-Quality Pizza at Home
References
- Felicetti, R. (2014). *The Art of Fermentation*. Cherry Valley Publishing.
- McGee, H. (2004). *On Food and Cooking: The Science and Lore of the Kitchen*. Scribner.
- Gisslen, W. (2010). *Professional Baking*. Wiley.
Похожие записи:
 Mastering Thin-Crust Pizza: Secrets to Achieve Perfect Crispiness and Tenderness
 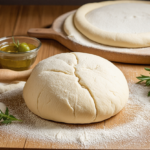 Mastering the Art of Achieving the Perfect Rise for Your Pizza Crust
 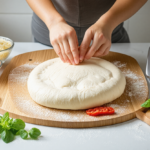 Mastering Homemade Pizza Dough: Expert Tips for Perfect Results
 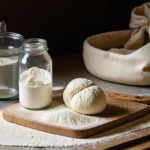 Choosing the Perfect Flour for Flawless Pizza Dough: A Complete Guide
 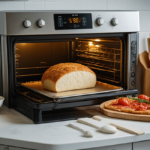 Mastering Oven Temperatures: The Key to Perfect Baking Every Time
  How to Create a Flavorful Homemade Tomato Sauce: Secrets for the Perfect Pizza Base
  The Impact of Cheese Fermentation on Bioavailability of Nutrients
  Mastering the Art of Evenly Cooked Pizza Toppings Without Burning the Crust Mastering the Art of Stuffed and Deep-Dish Pizzas: Techniques, Tips, and Recipes
  Mastering the Art of Stuffed Crusts: Techniques for Making Delicious Pizzas at Home
  Using a Grill to Achieve Smoky-Flavored Pizzas: The Ultimate Guide for Pizza Enthusiasts
  Mastering Restaurant-Quality Pizzas at Home: The Ultimate Guide to Using a Pizza Stone
  New York-Style Thin Crust Pizza: The Iconic Street Food of the Big Apple
  Mastering Vegan and Vegetarian Pizza: Delicious Recipes and Culinary Inspiration
  Mastering Gluten-Free and Keto-Friendly Pizza Bases: Delicious Recipes and Tips
  Mastering Pizza Craft: How to Use a Pizza Peel for Effortless Oven Transfer